Initialize offer creation process
Permission level required: ✅ Entity User or above as the Offer Creator in the workflow group
Written By RecruiterPal Helpdesk
Last updated 3 months ago
1. In the job opportunity, identify the candidate to make an offer; Click View, and in the right detail panel, click on Actions > Make Offer
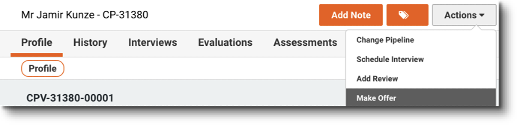
2. In the dialog, choose the offer workflow setting and click Next
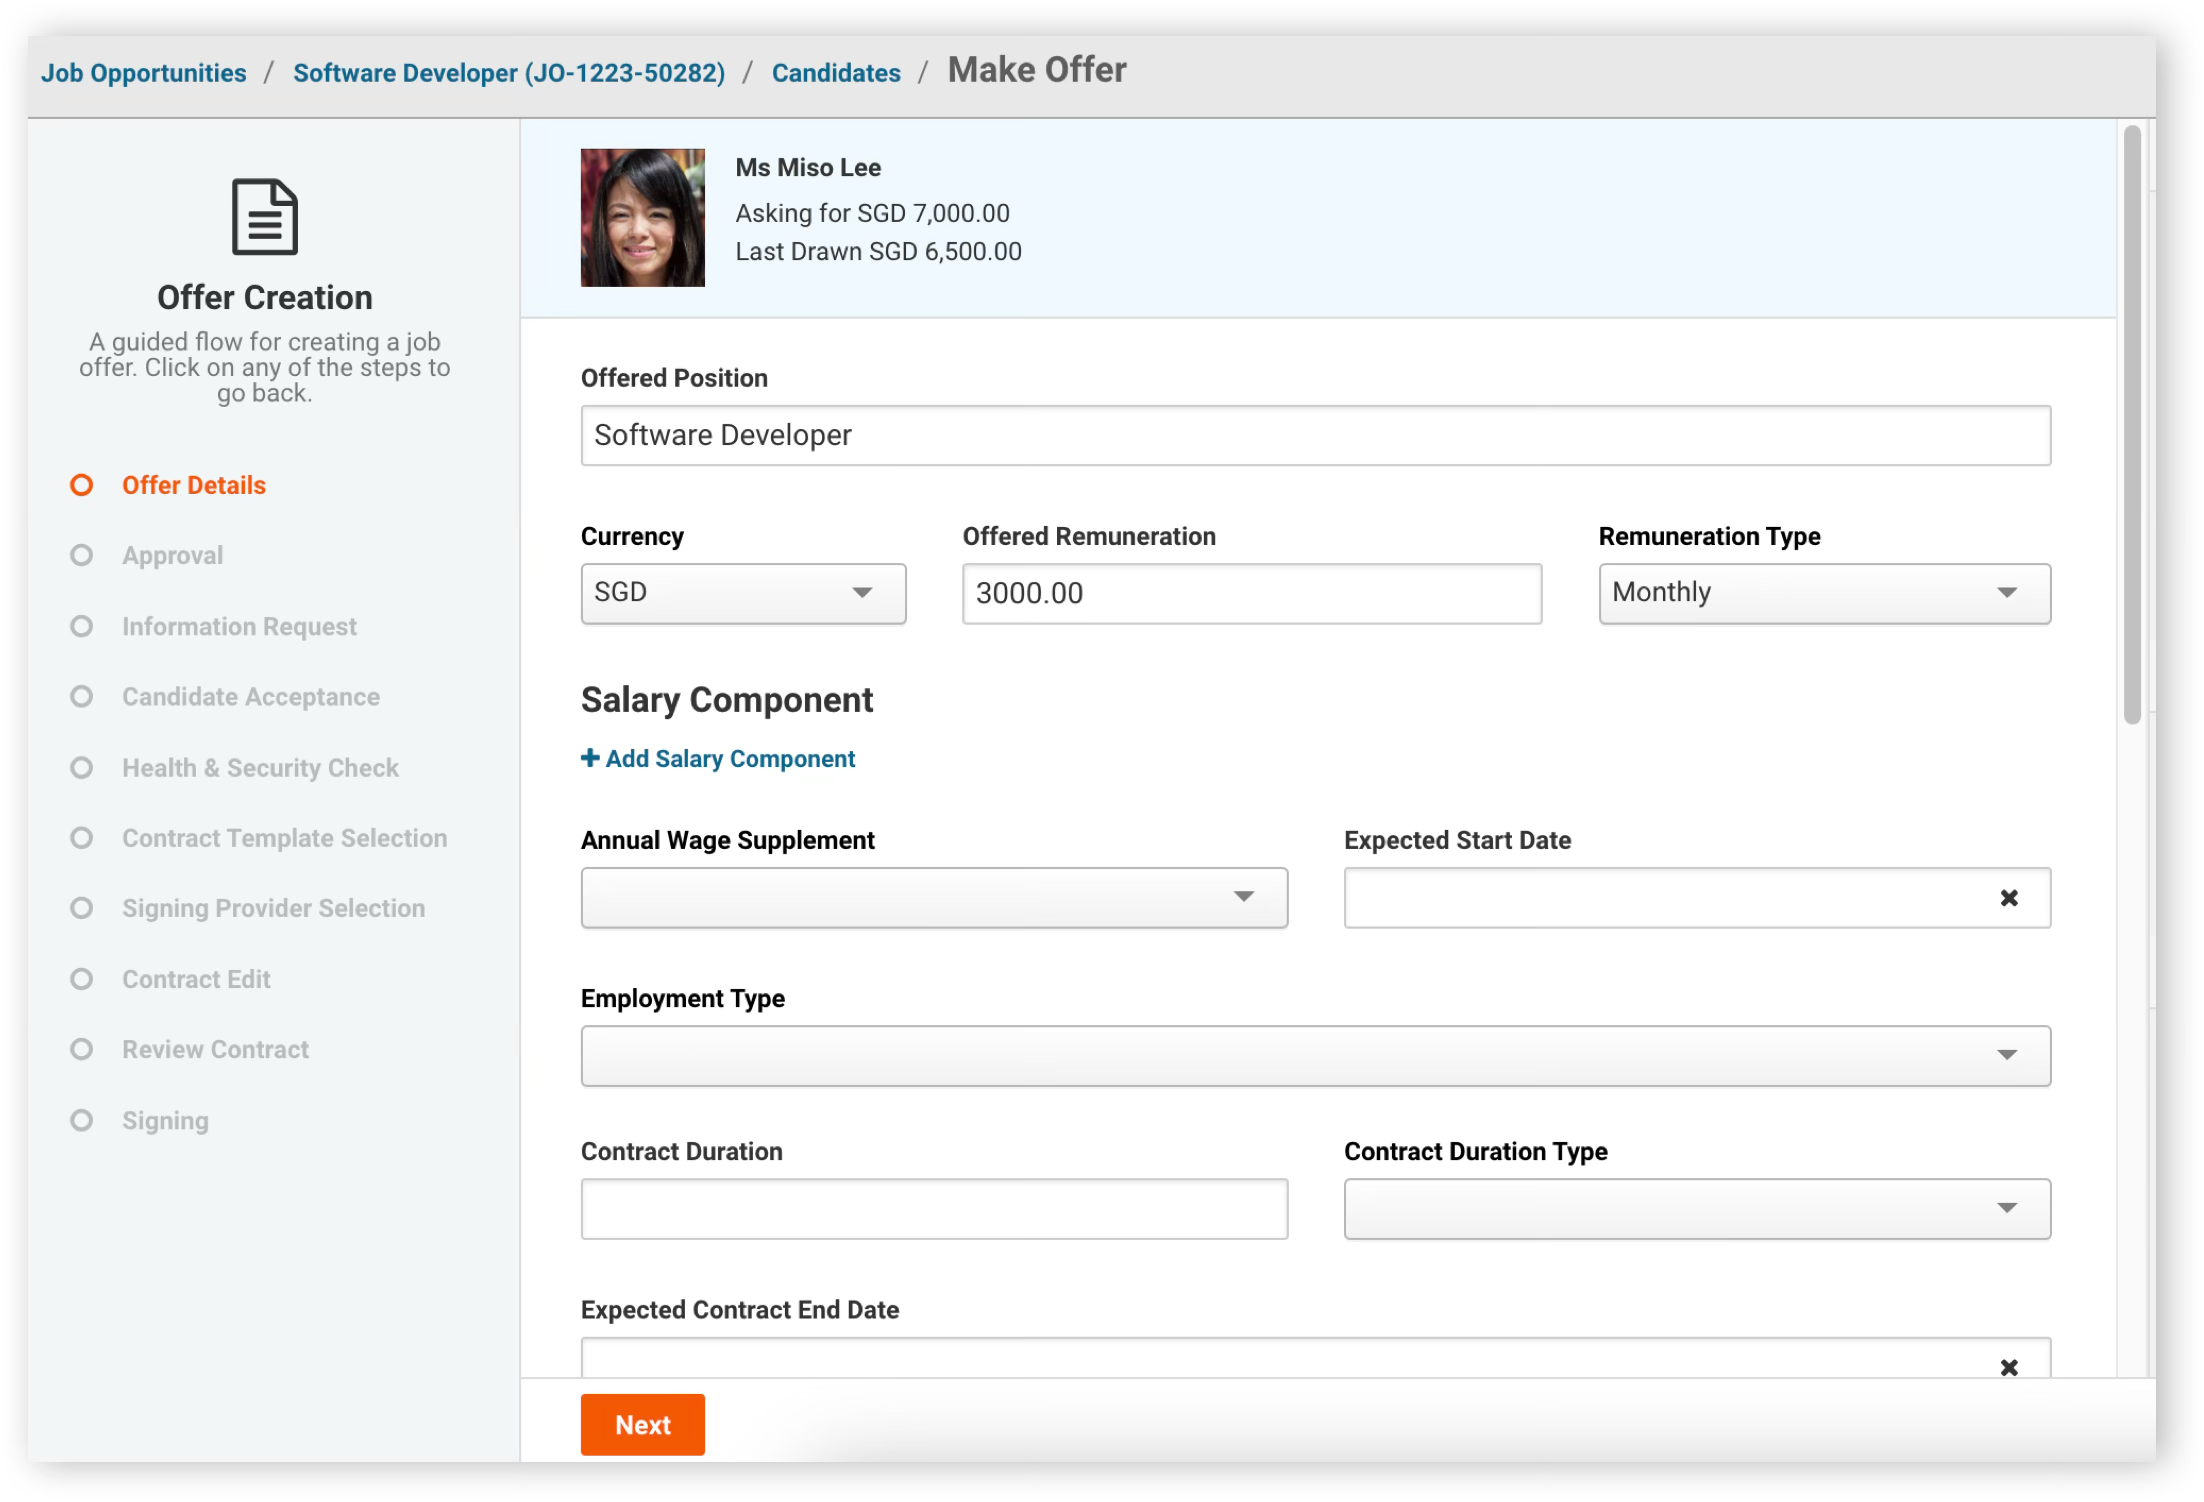
• Offer details
3. Fill in the offer details as listed, and click Next
• Offer approval
4. Select the appropriate approver for the respective approval level
5. Check the “Notify Proxy” checkbox for the proxy to be notified of this offer, and to enable them to approve the offer on behalf of the designated approver
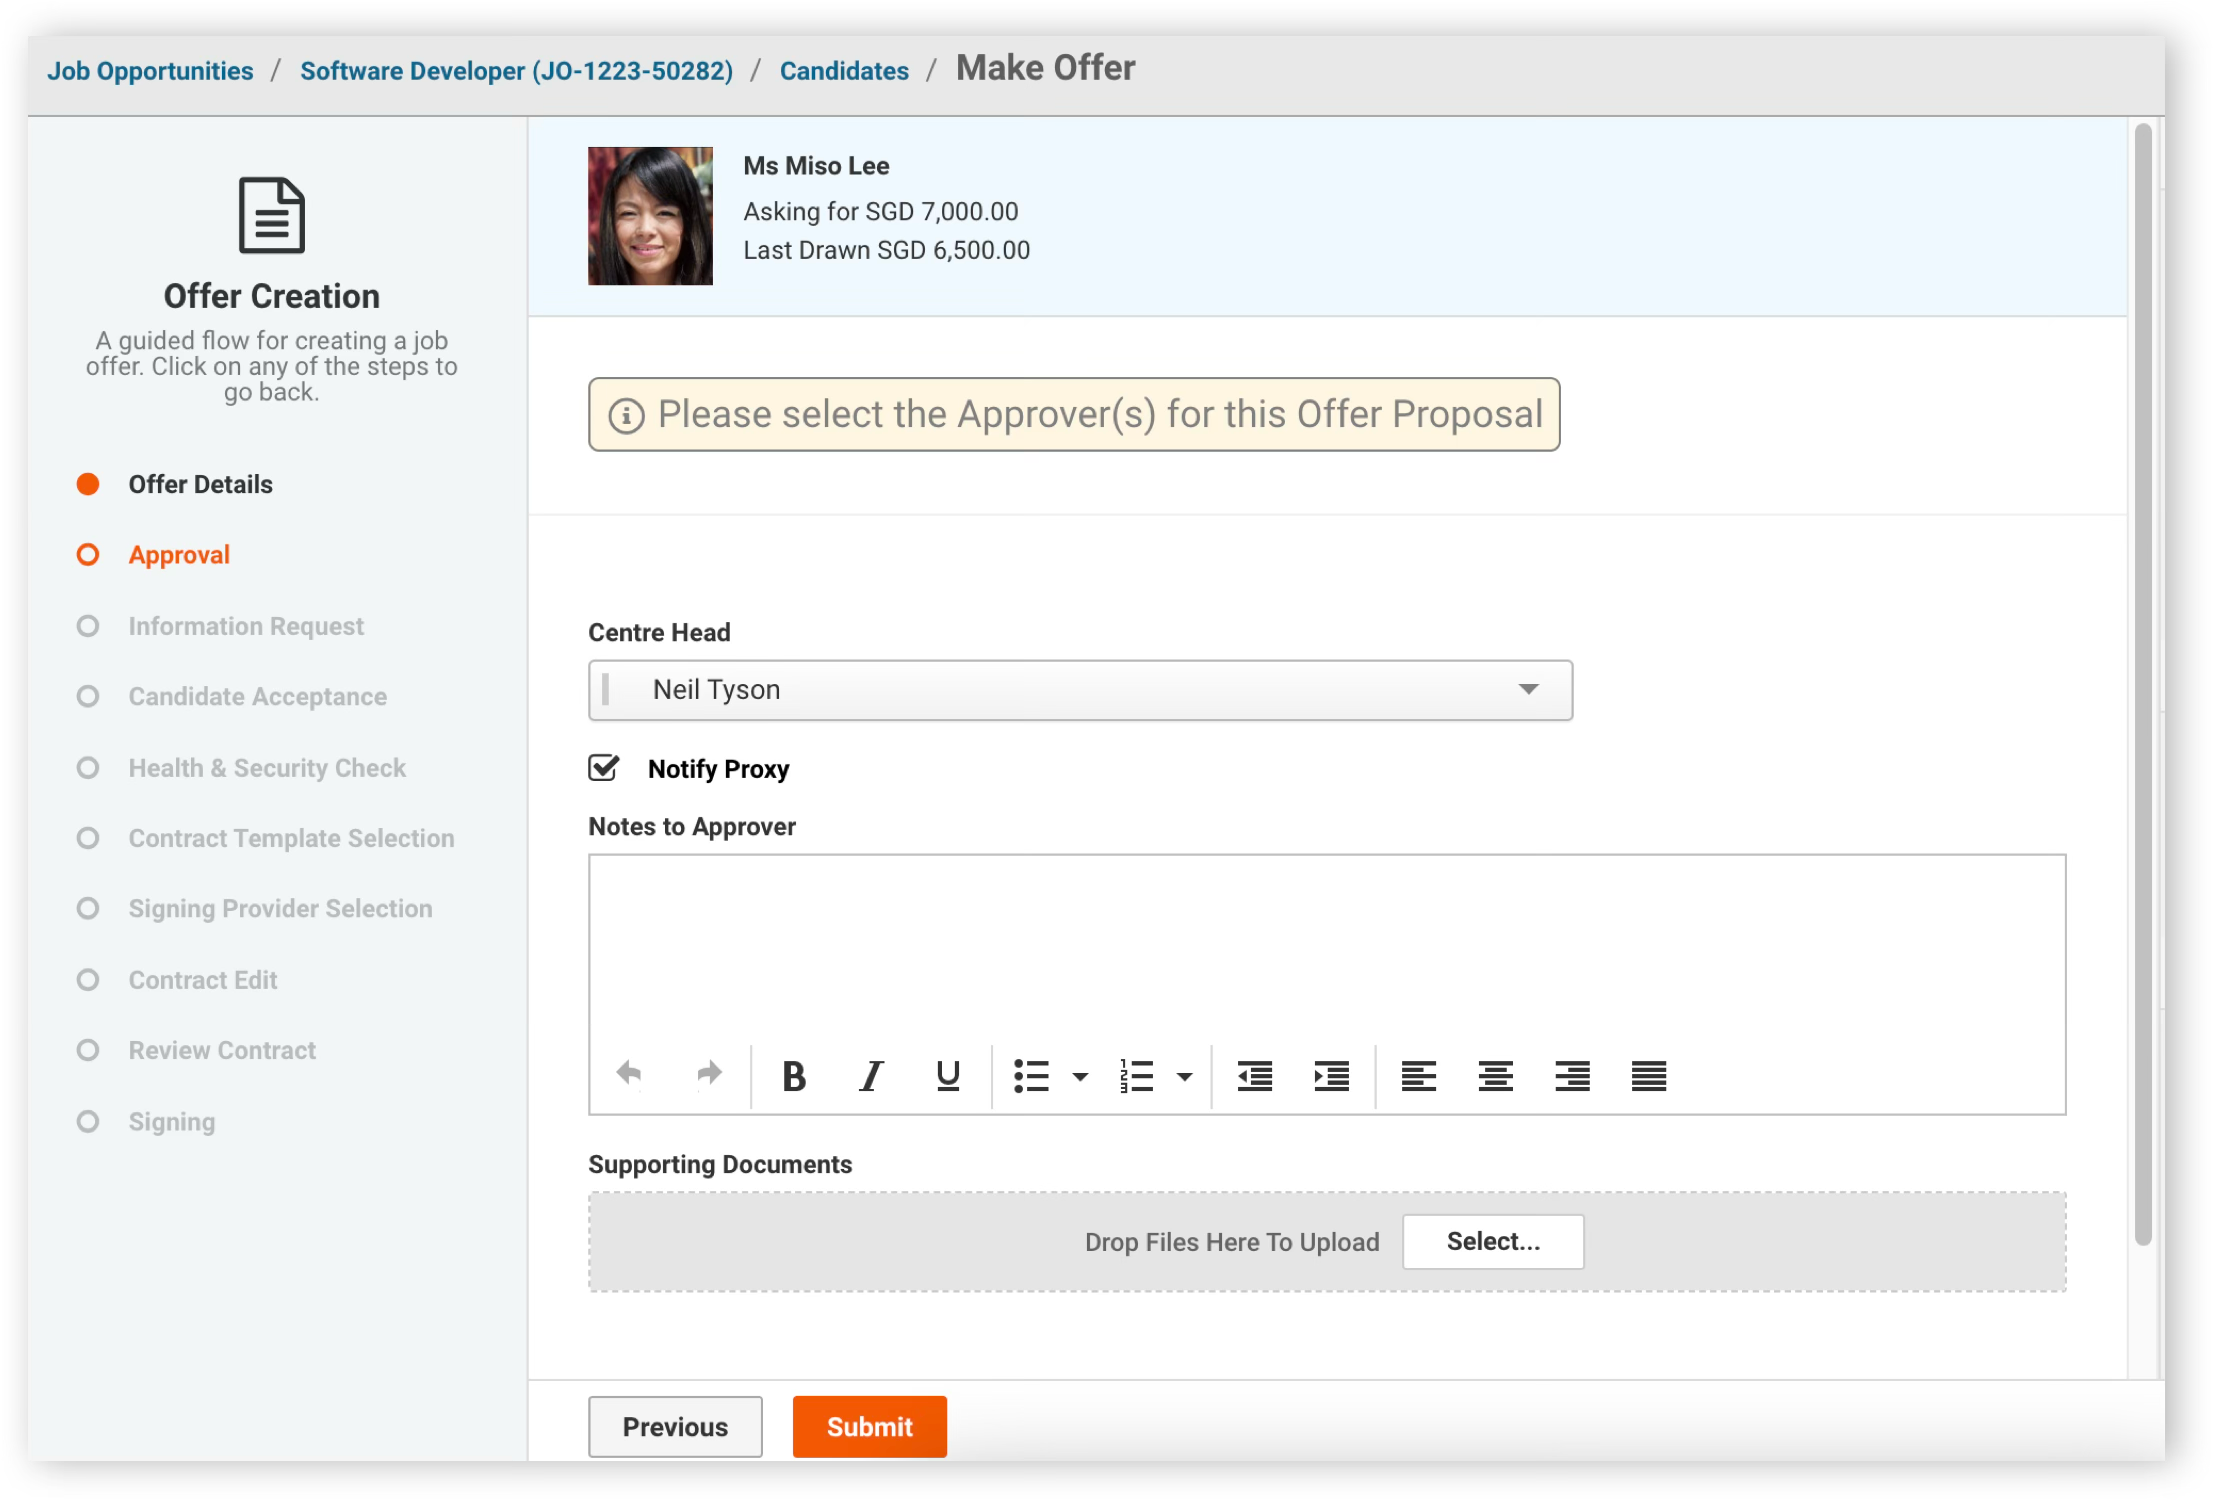
6. Write the notes to the approver(s) and upload any supporting document
7. Click on Submit to proceed to trigger the offer for approval(s)
• Information request
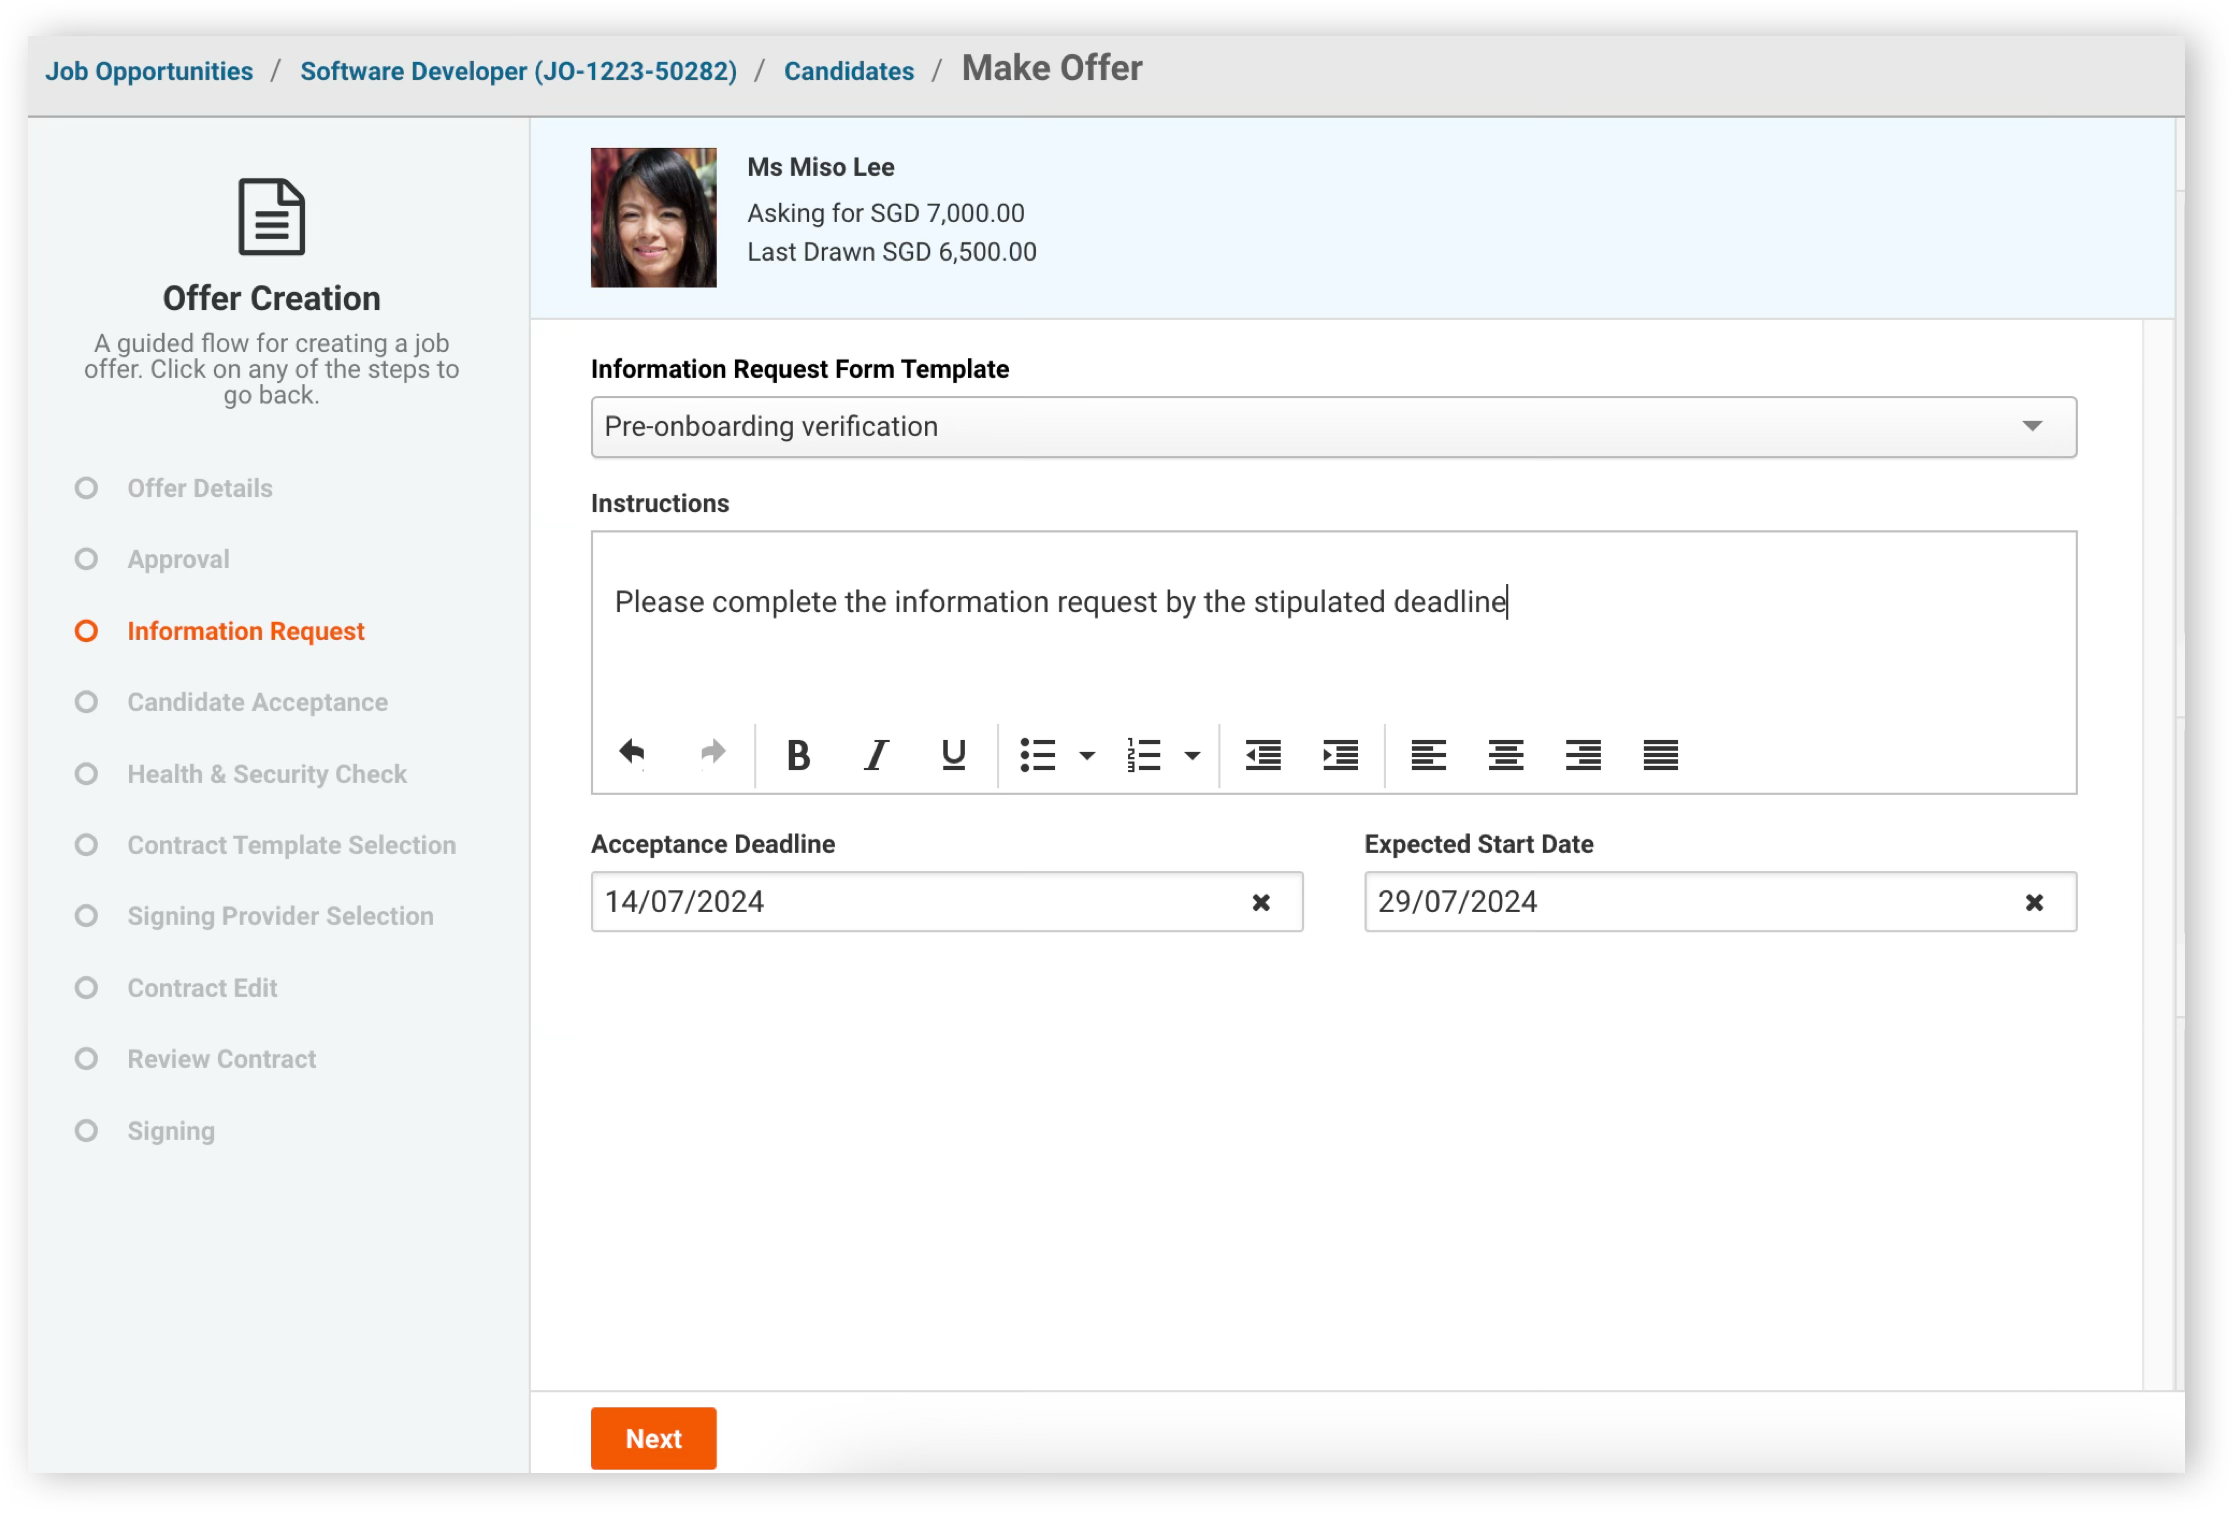
8. After the Offer is approved by the relevant approver(s), you may proceed to issue the candidate an information request. Click Next to proceed to Information Request stage
9. Choose the Information Request Form Template required, list down the instructions and set the Acceptance Deadline and Expected Start Date for the candidate
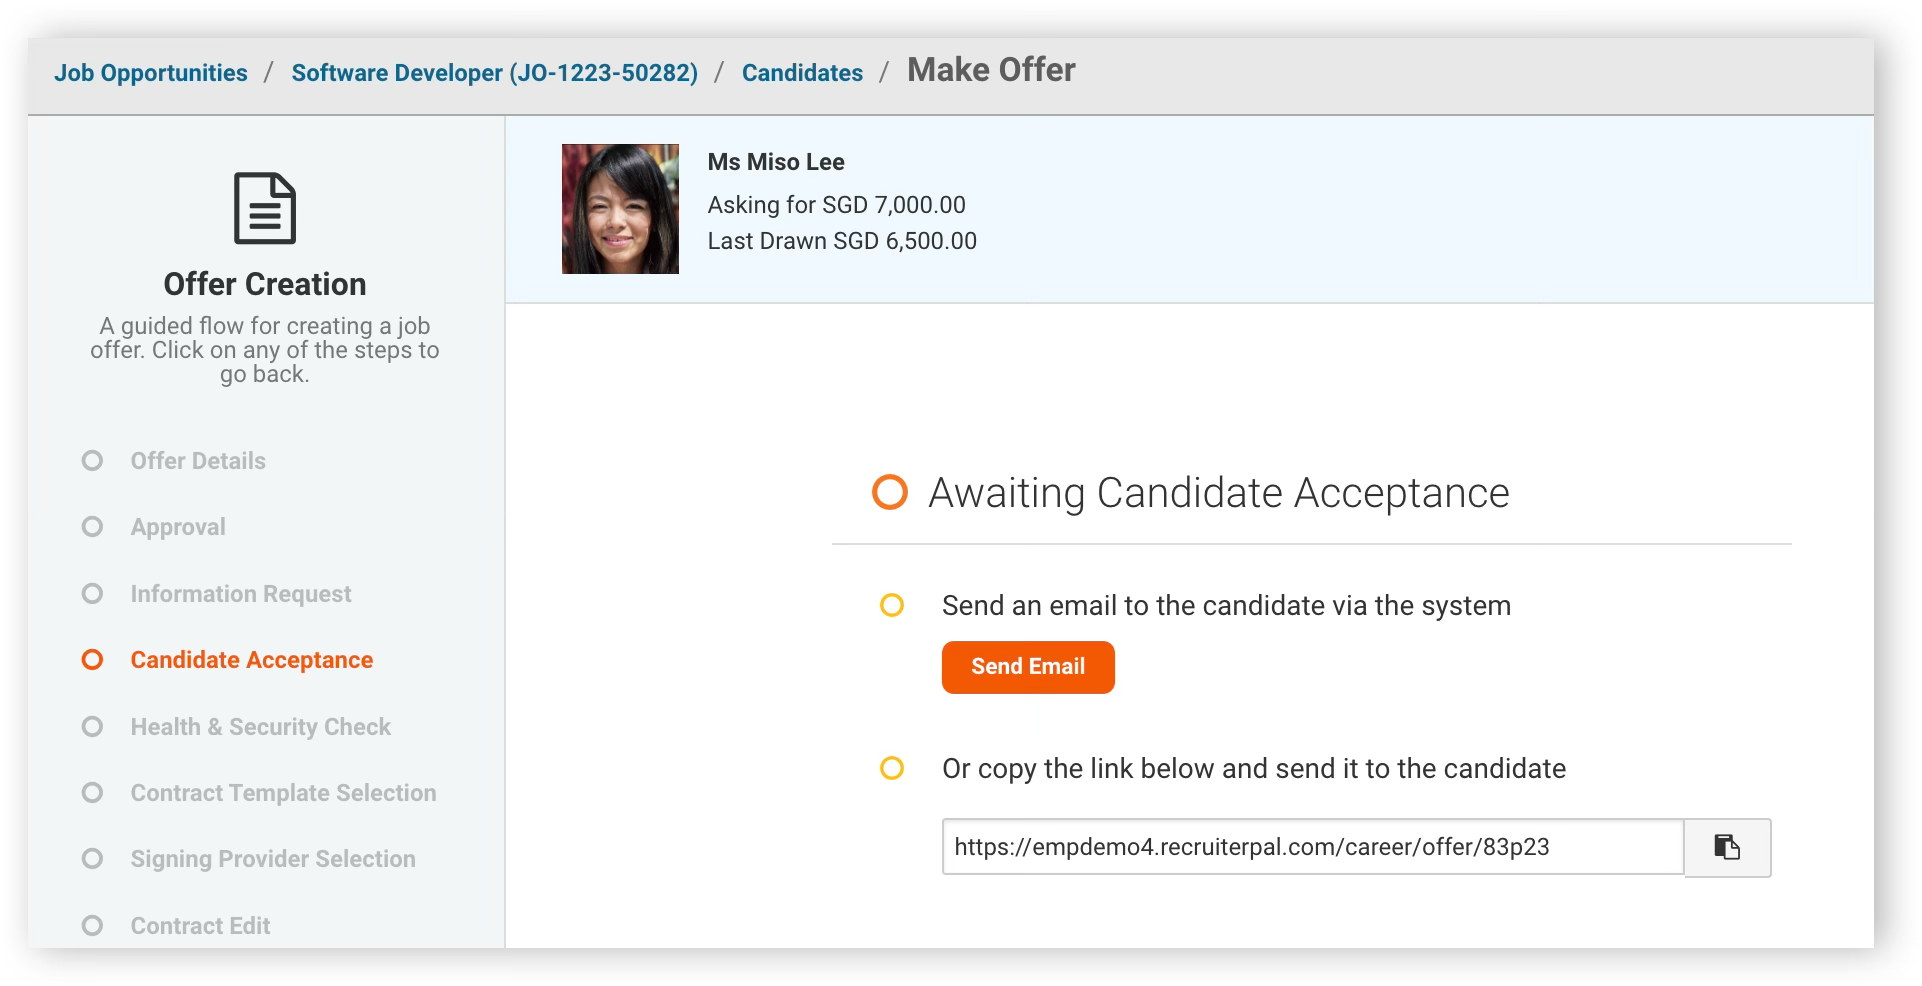
• Candidate acceptance
10. Click on Send Email button to trigger an email to the candidate
11. Alternatively, you may like to copy the link and send it to the candidate through other communication channels
12. Select the template “Candidate Job Offer”, and choose the appropriate Job Offer Template to load the chosen email template format
13. Select Click Preview and Send
14. Once the candidate has accepted the Letter of Intent and completed the information request, you will be able to move to the next stage of the offer process
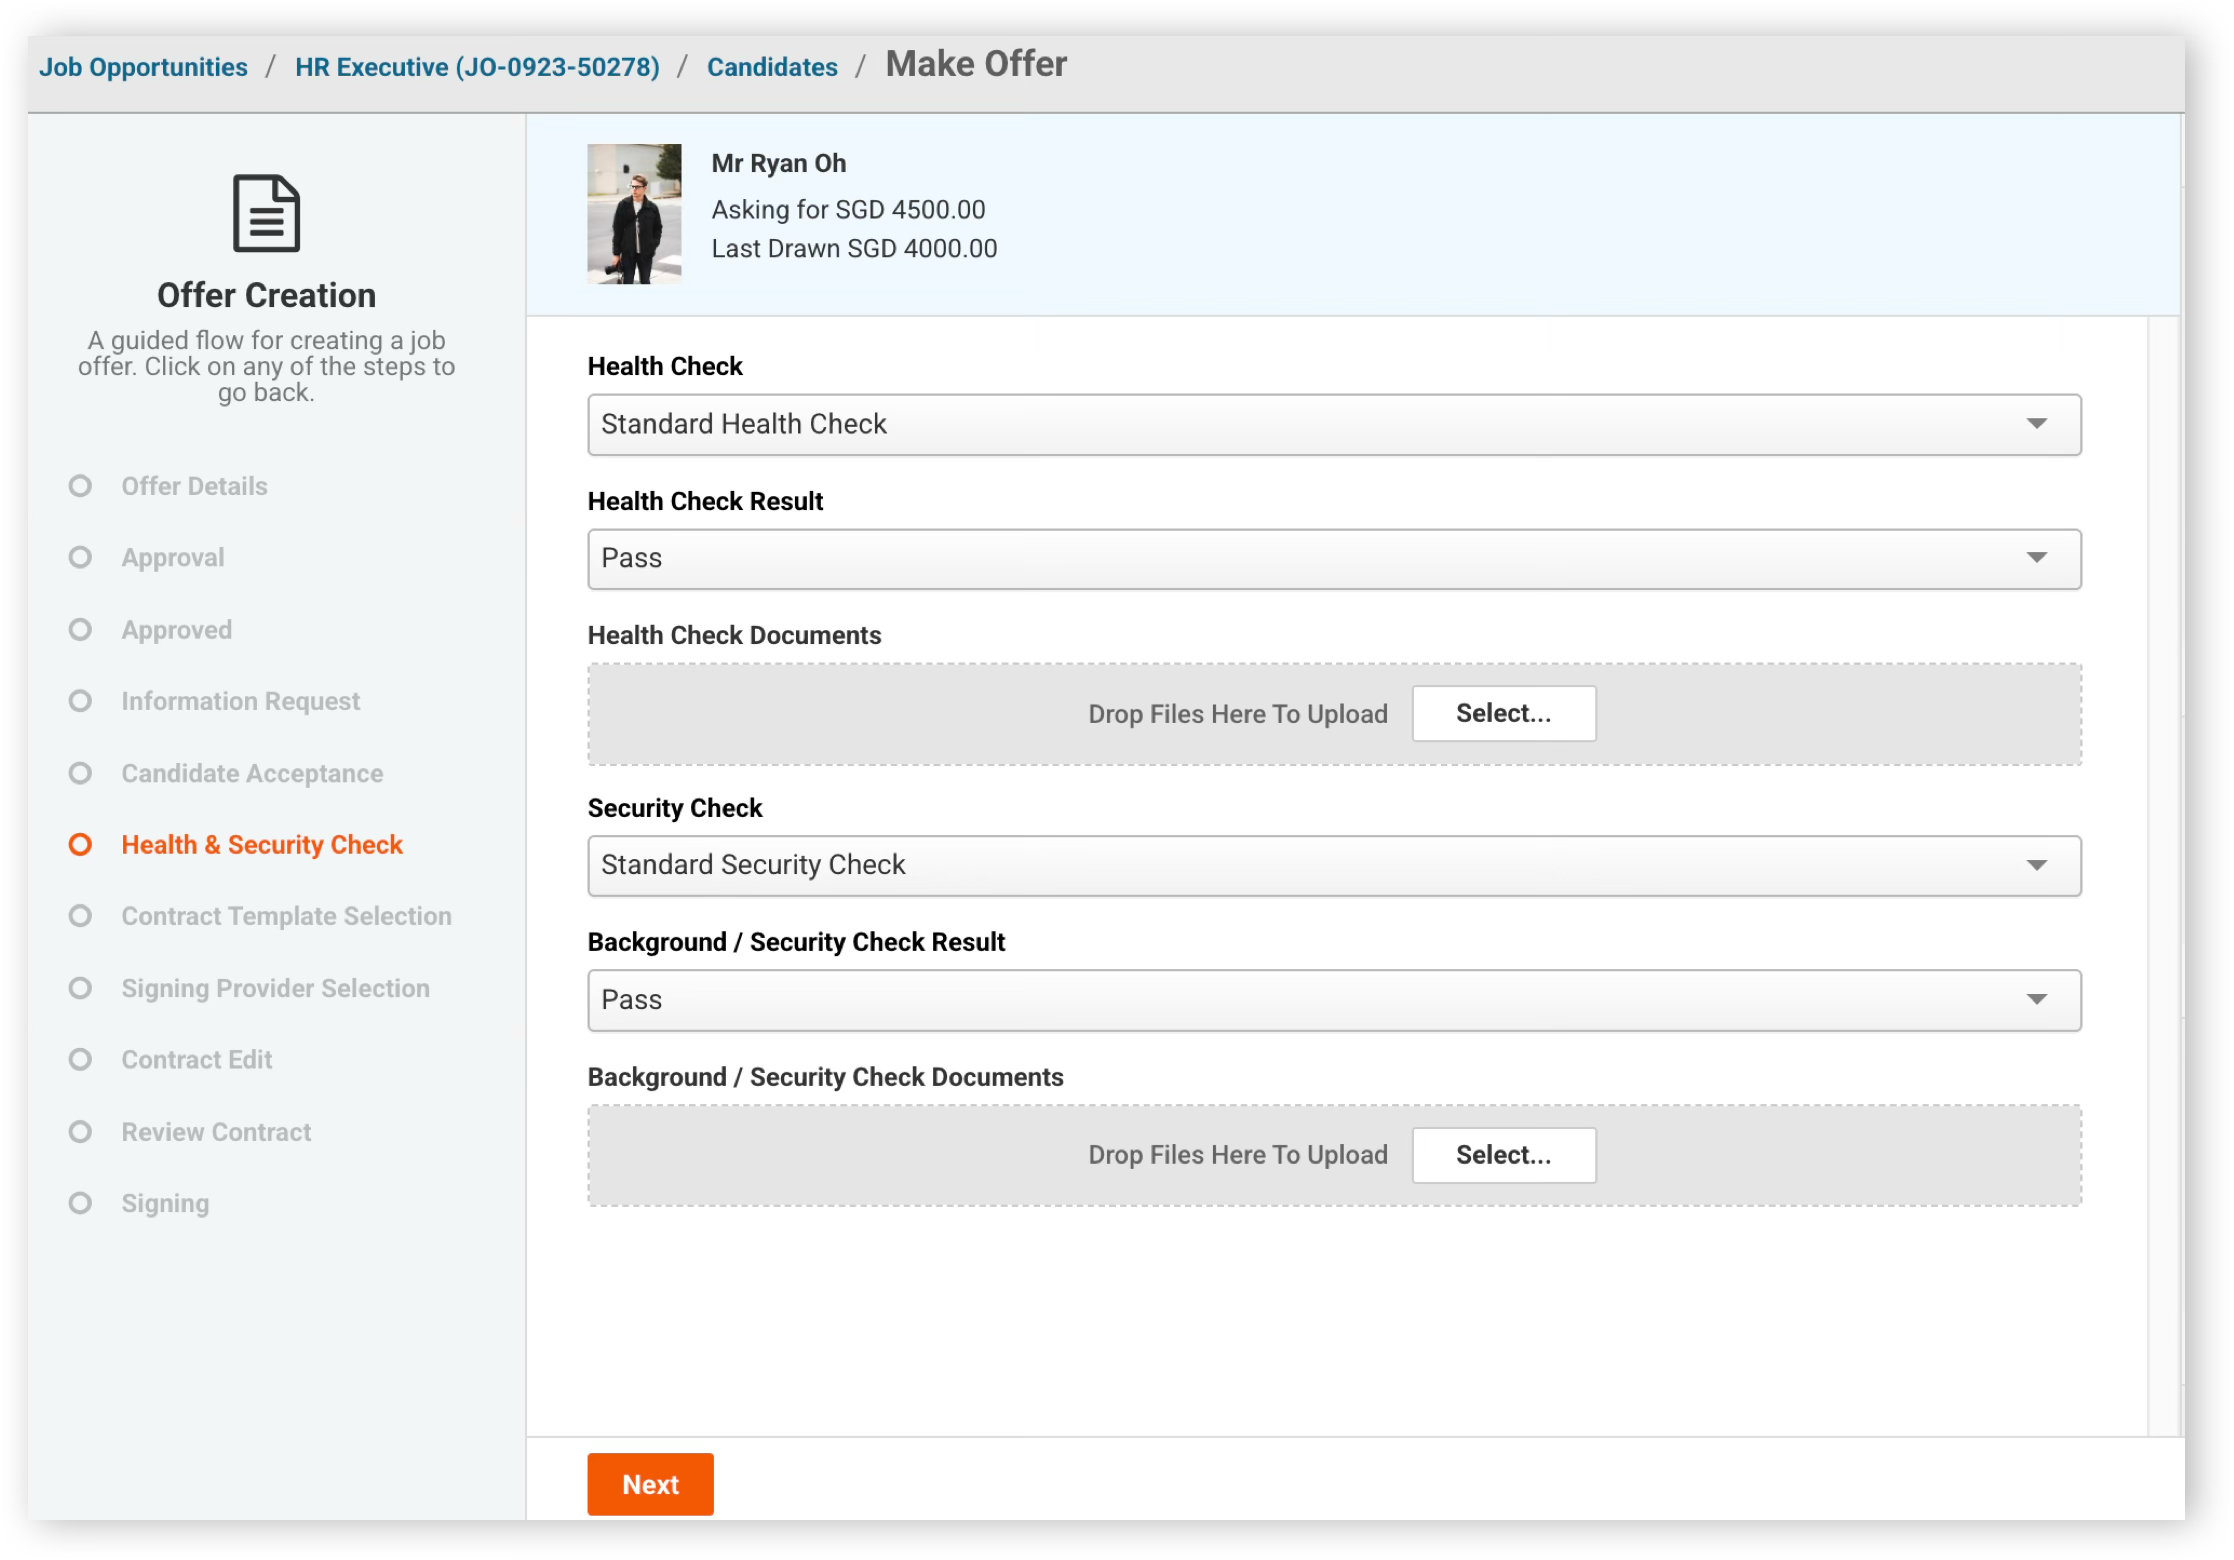
15. Fill up the appropriate information on the Health Check and Security Check Results, and upload the documents if applicable and click Next
16. If this is not applicable for the job, simply set as N/A and click Next
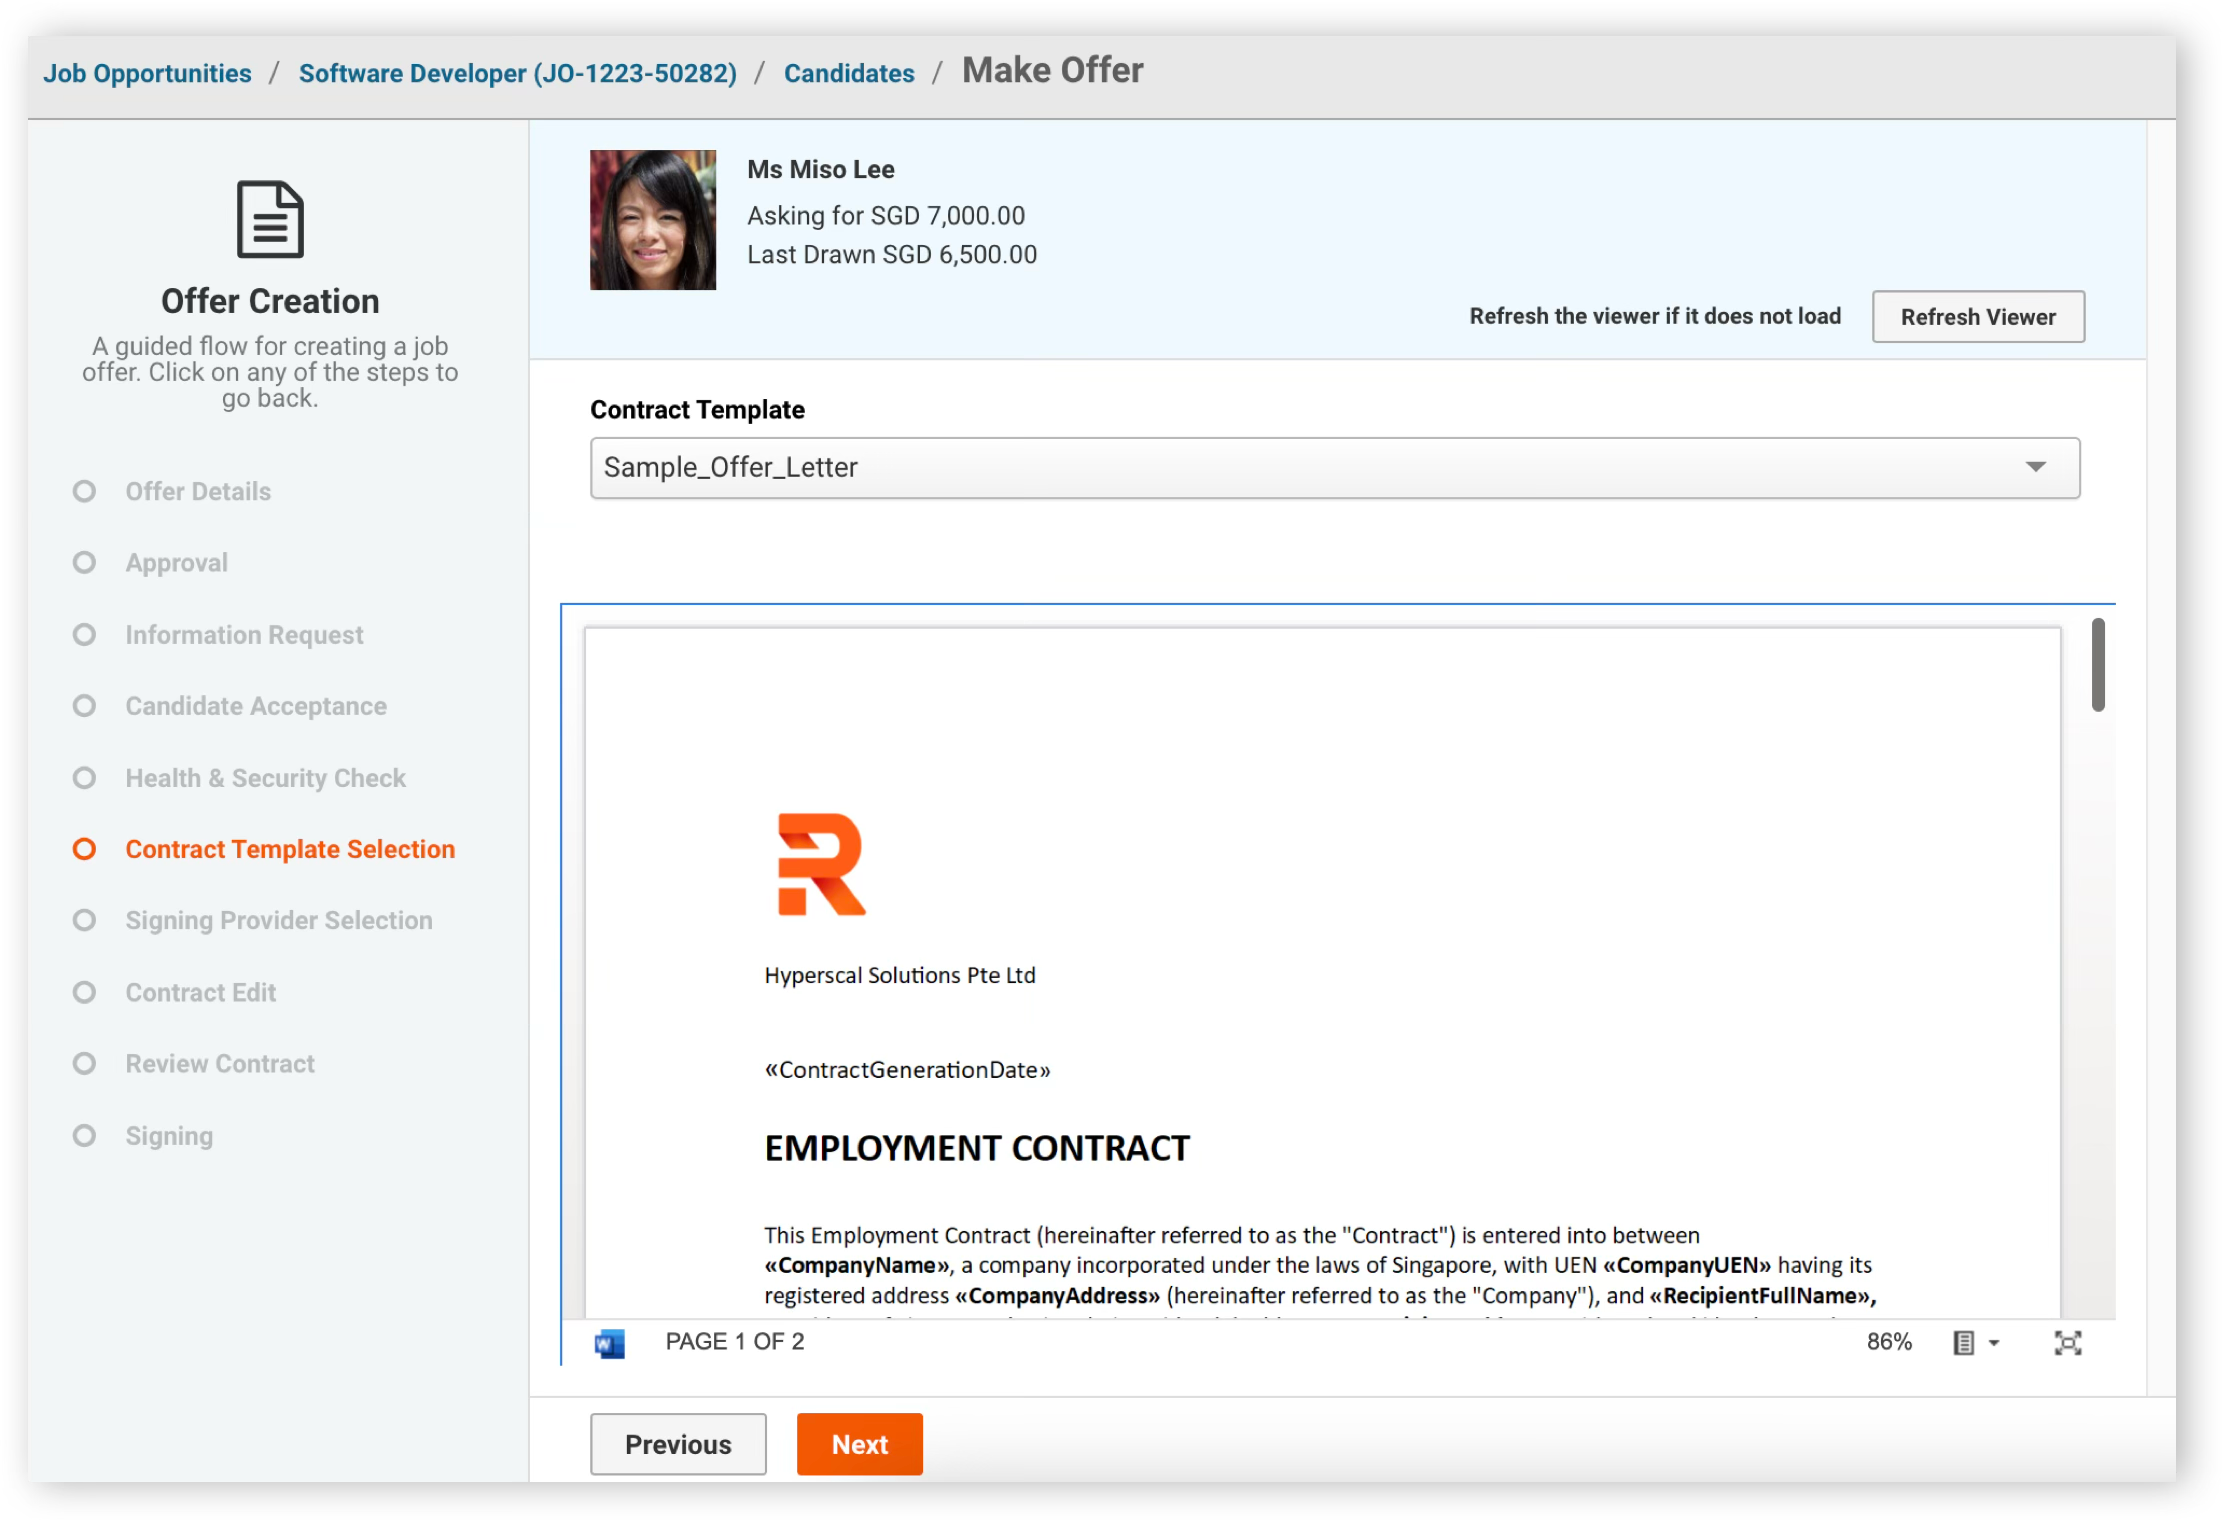
• Contract template selection
17. Select the appropriate contract template for the job position and click Next after confirming the template preview is correct
• Internal signer selection
18. Choose the appropriate internal signer(s) and the appropriate email template
19. Ensure that the deadlines set are accurate, before clicking Next
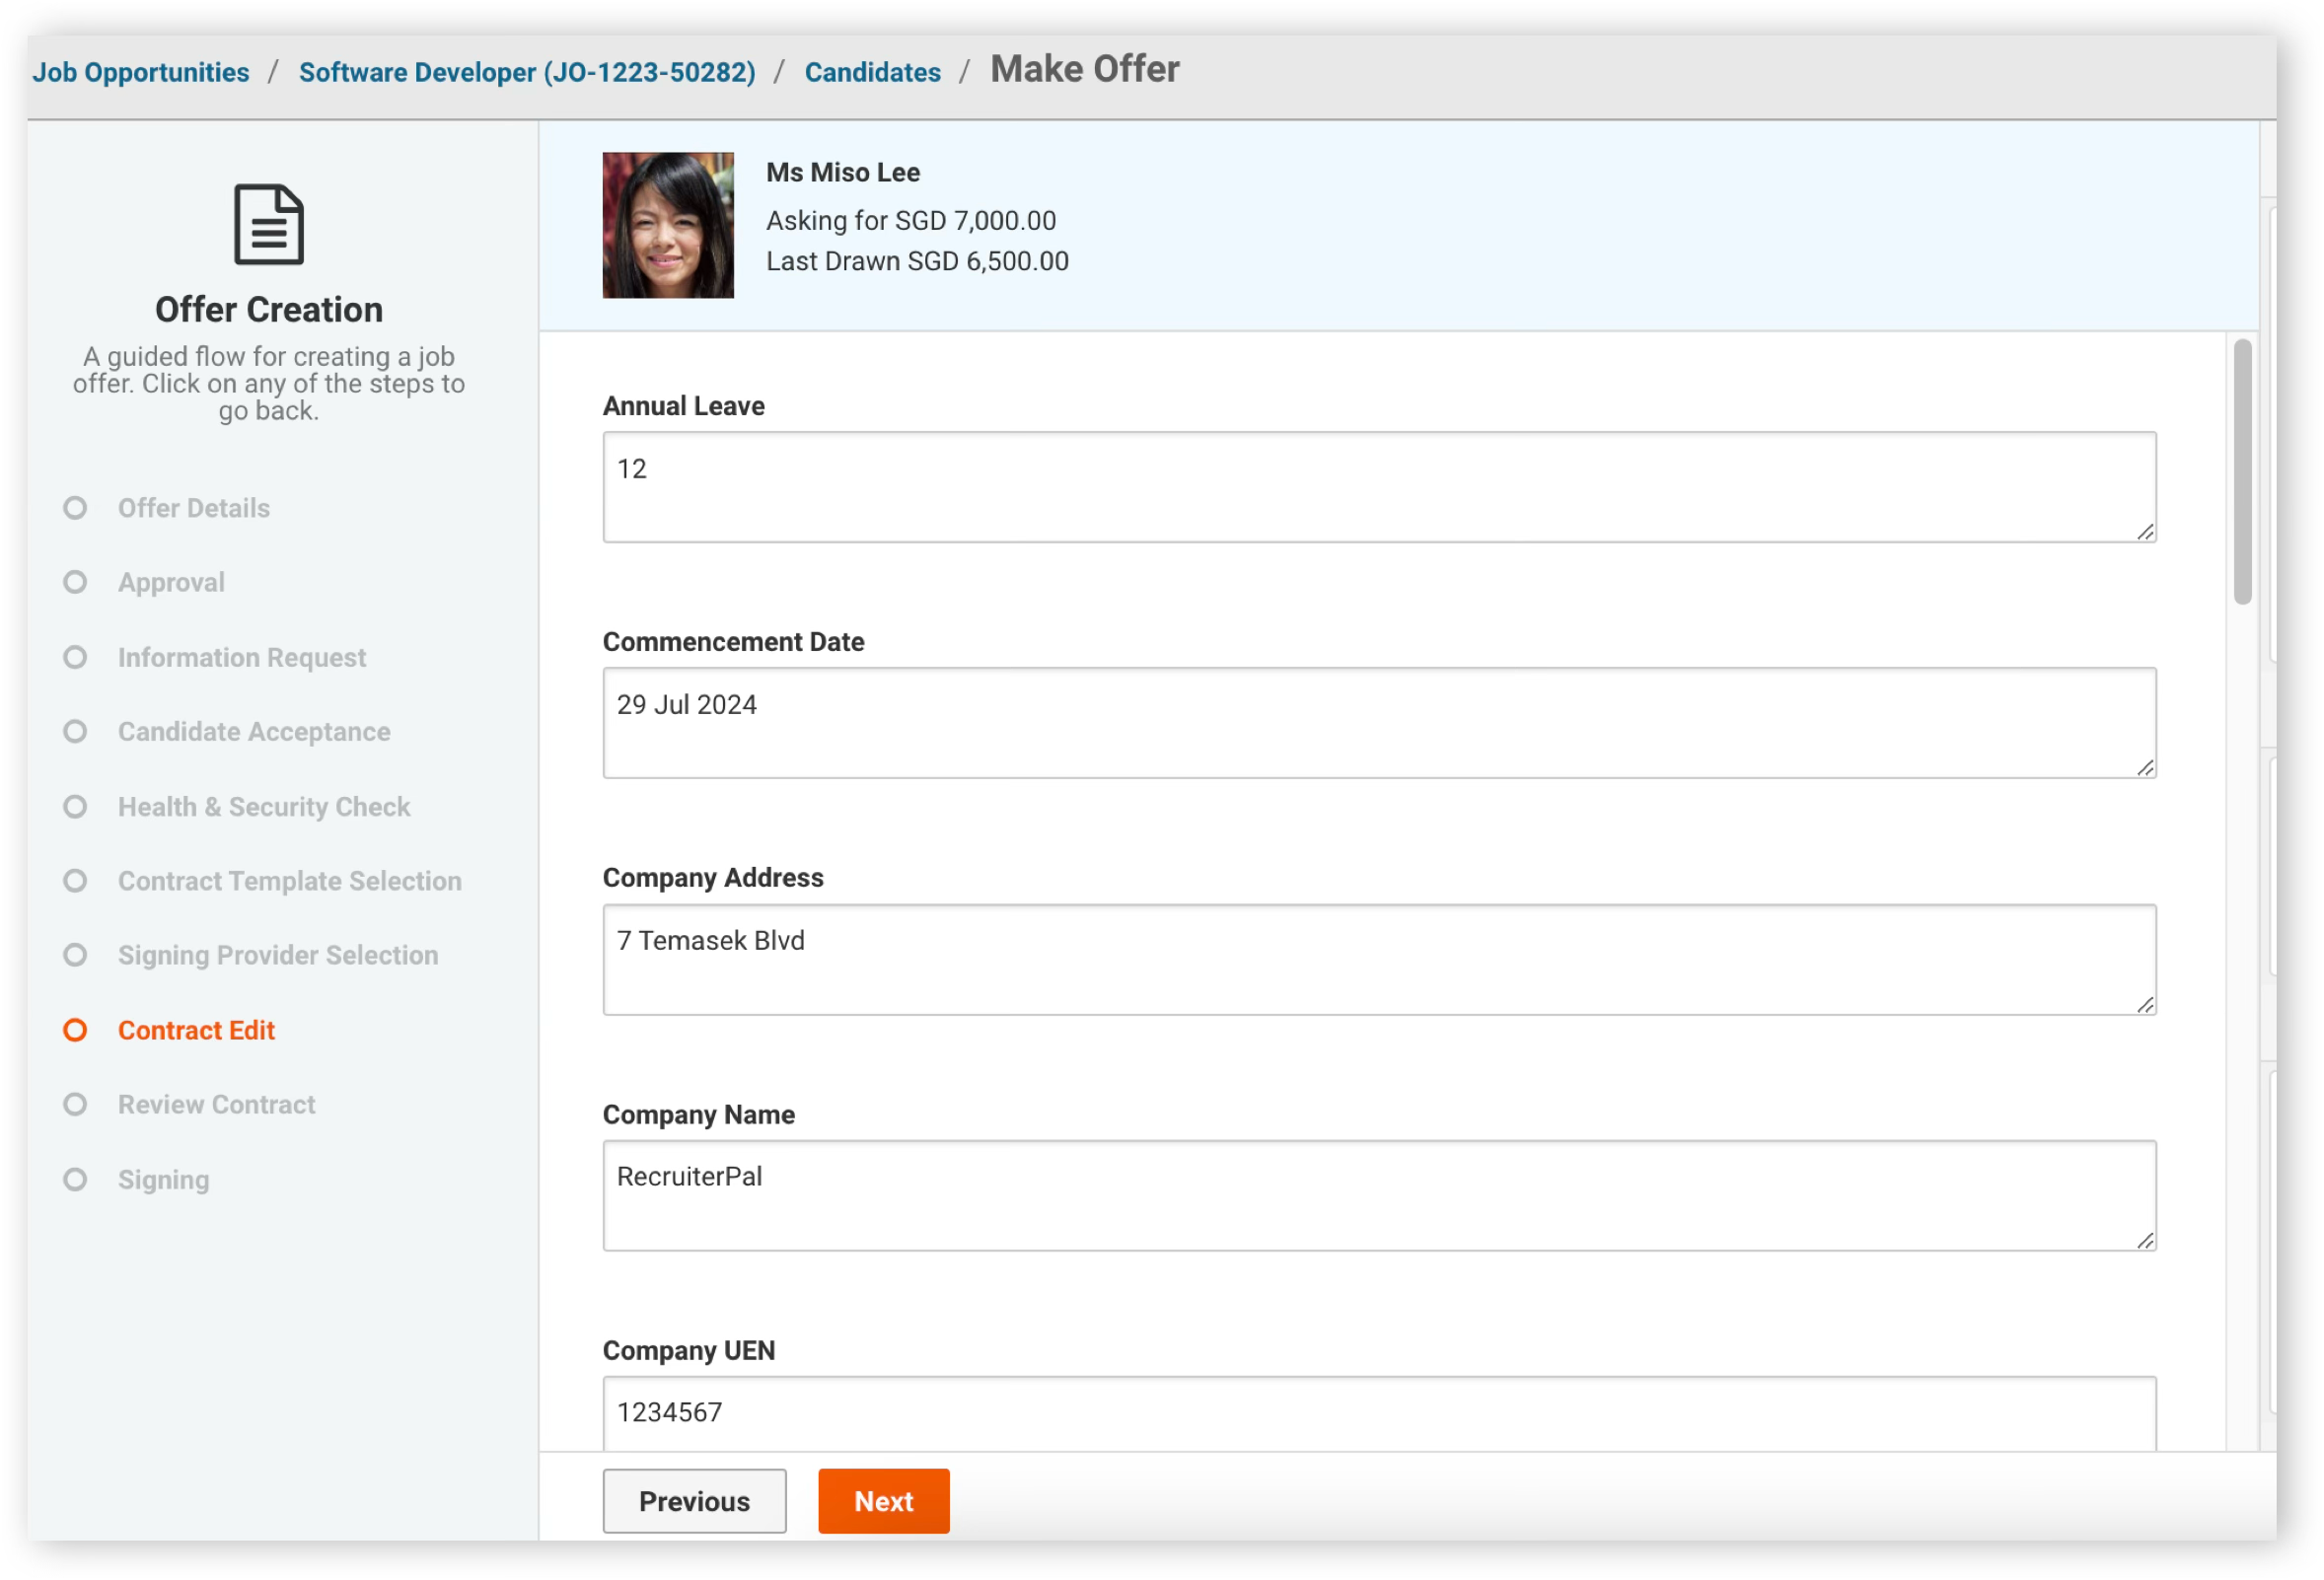
• Contract edit
20. Ensure that the details in the offer contract is accurate, and edit any fields that are either left blank or are filled inaccurately
21. Click Next to generate the contract document for review
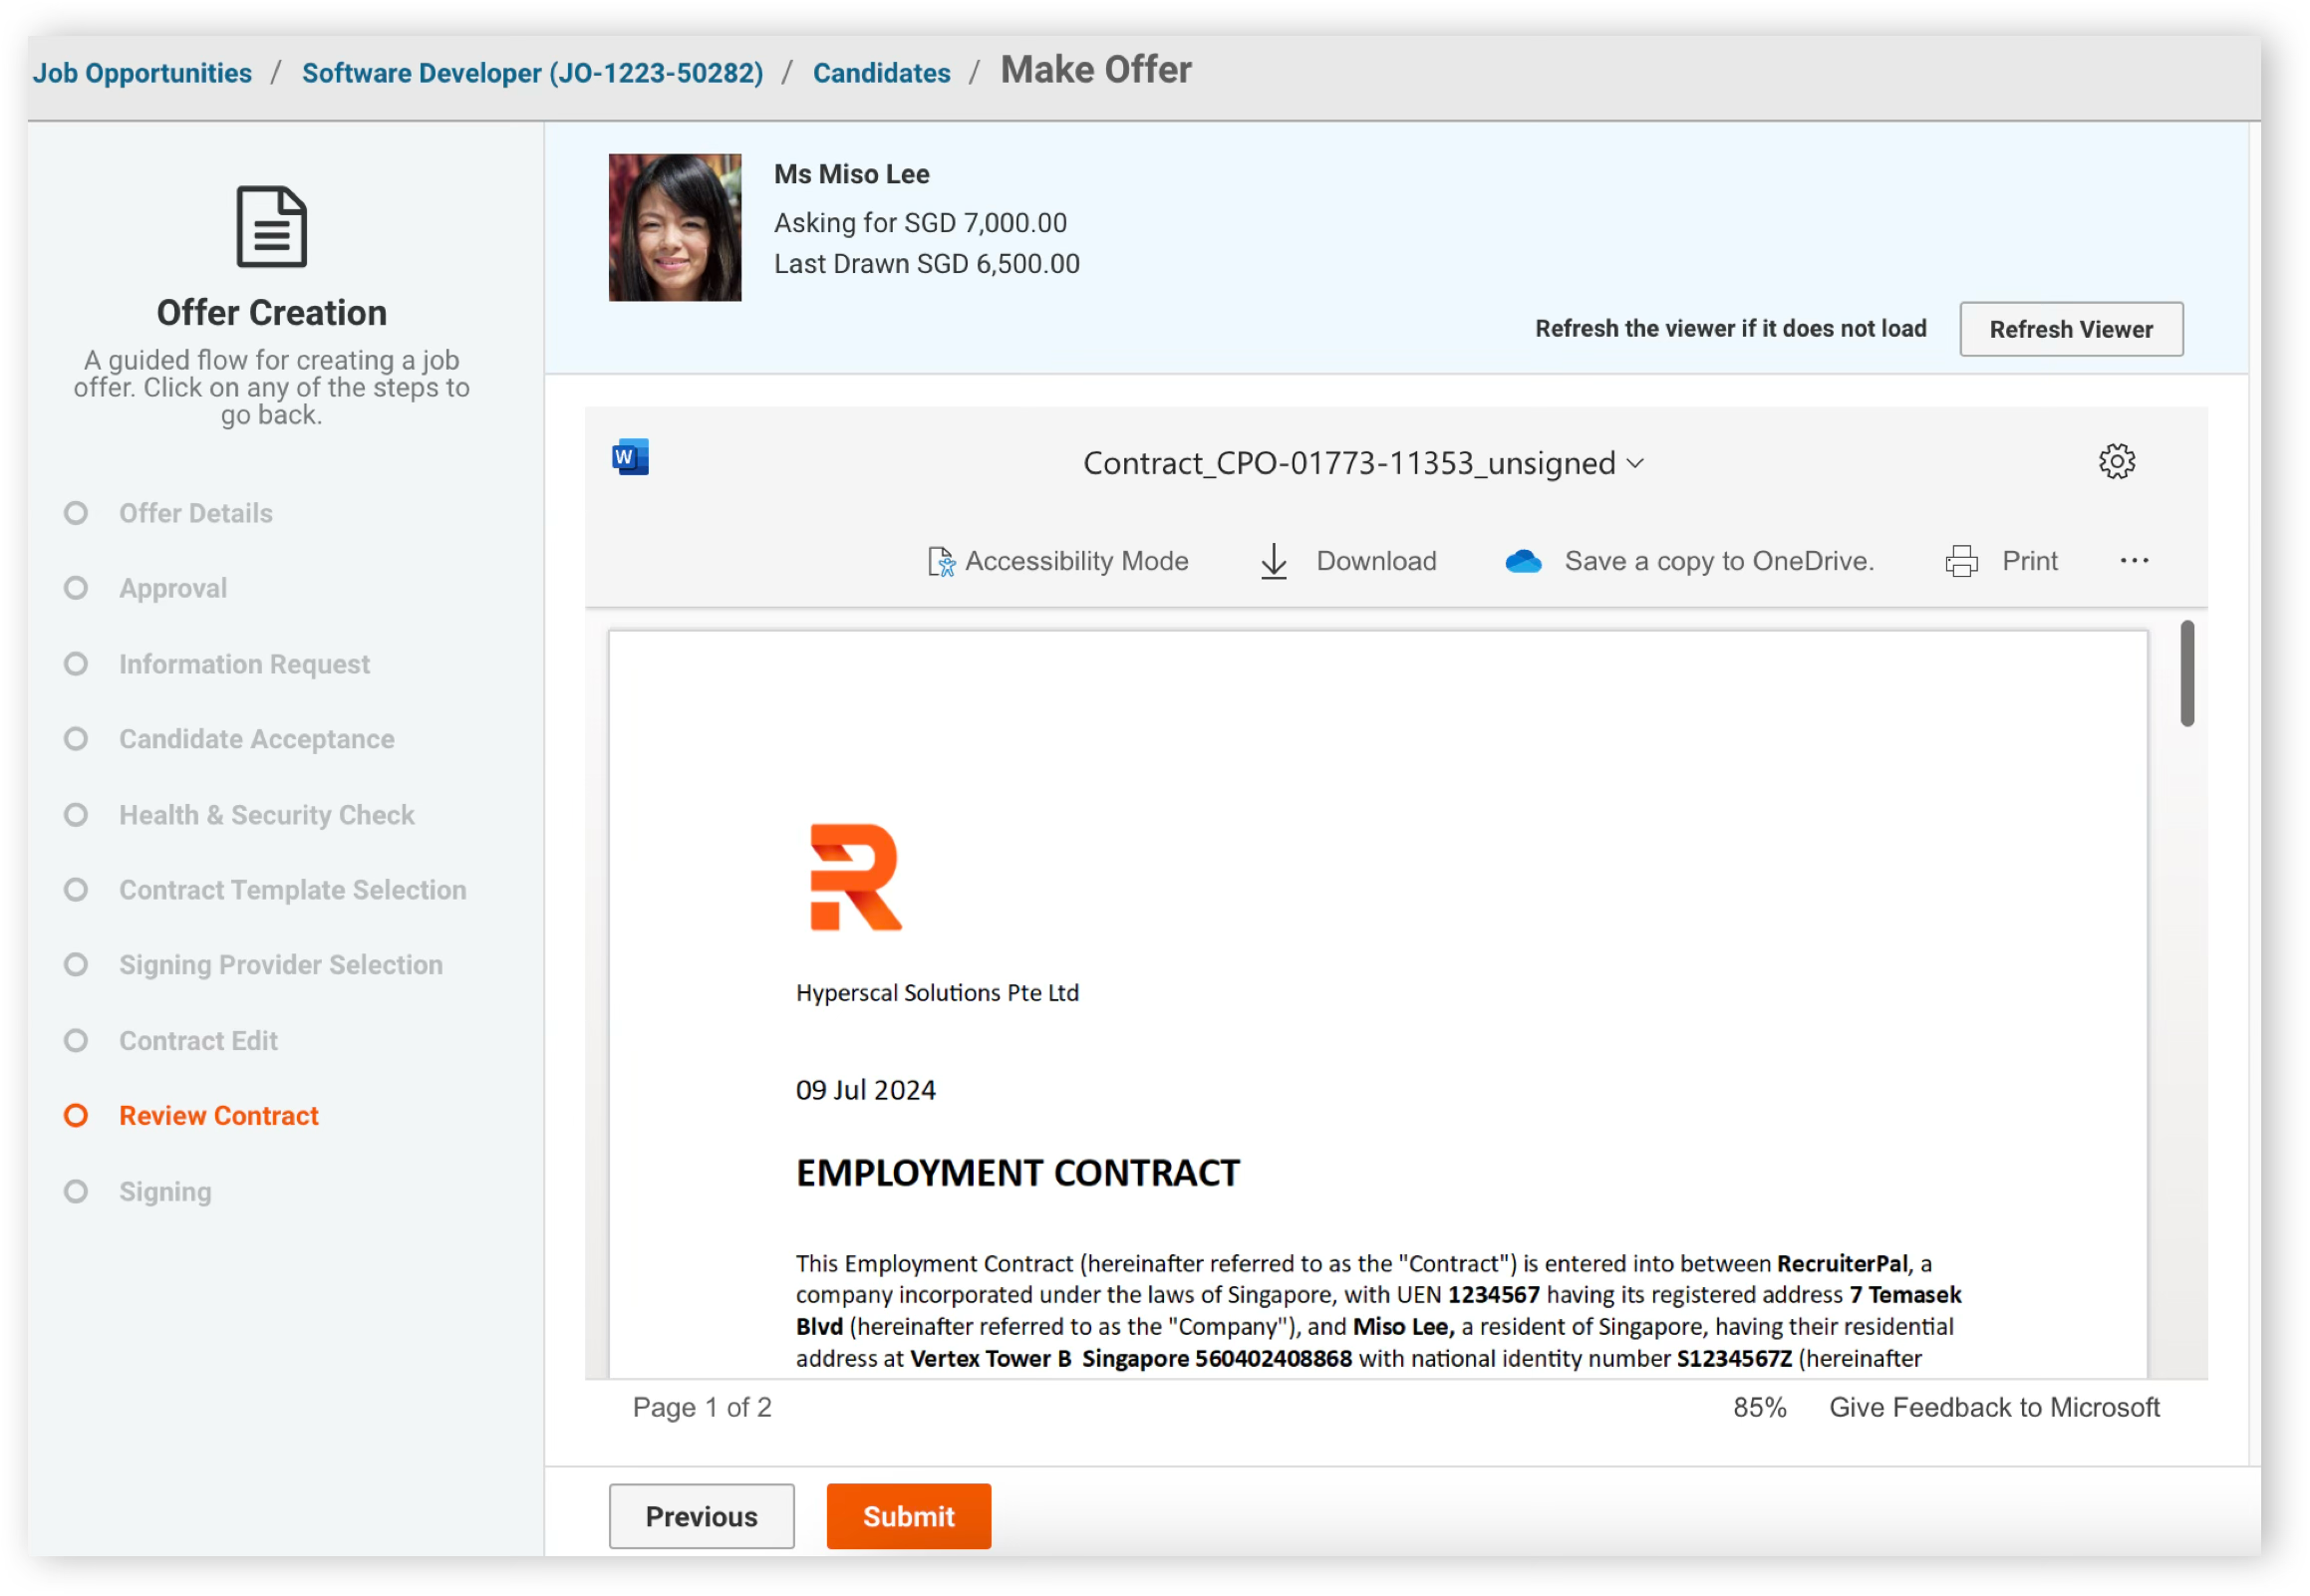
• Review contract
22. Review the generated contract
23. Click Previous if contract edits are required; Otherwise, click Submit to proceed to send for e-Signing
• Completion of offer workflow
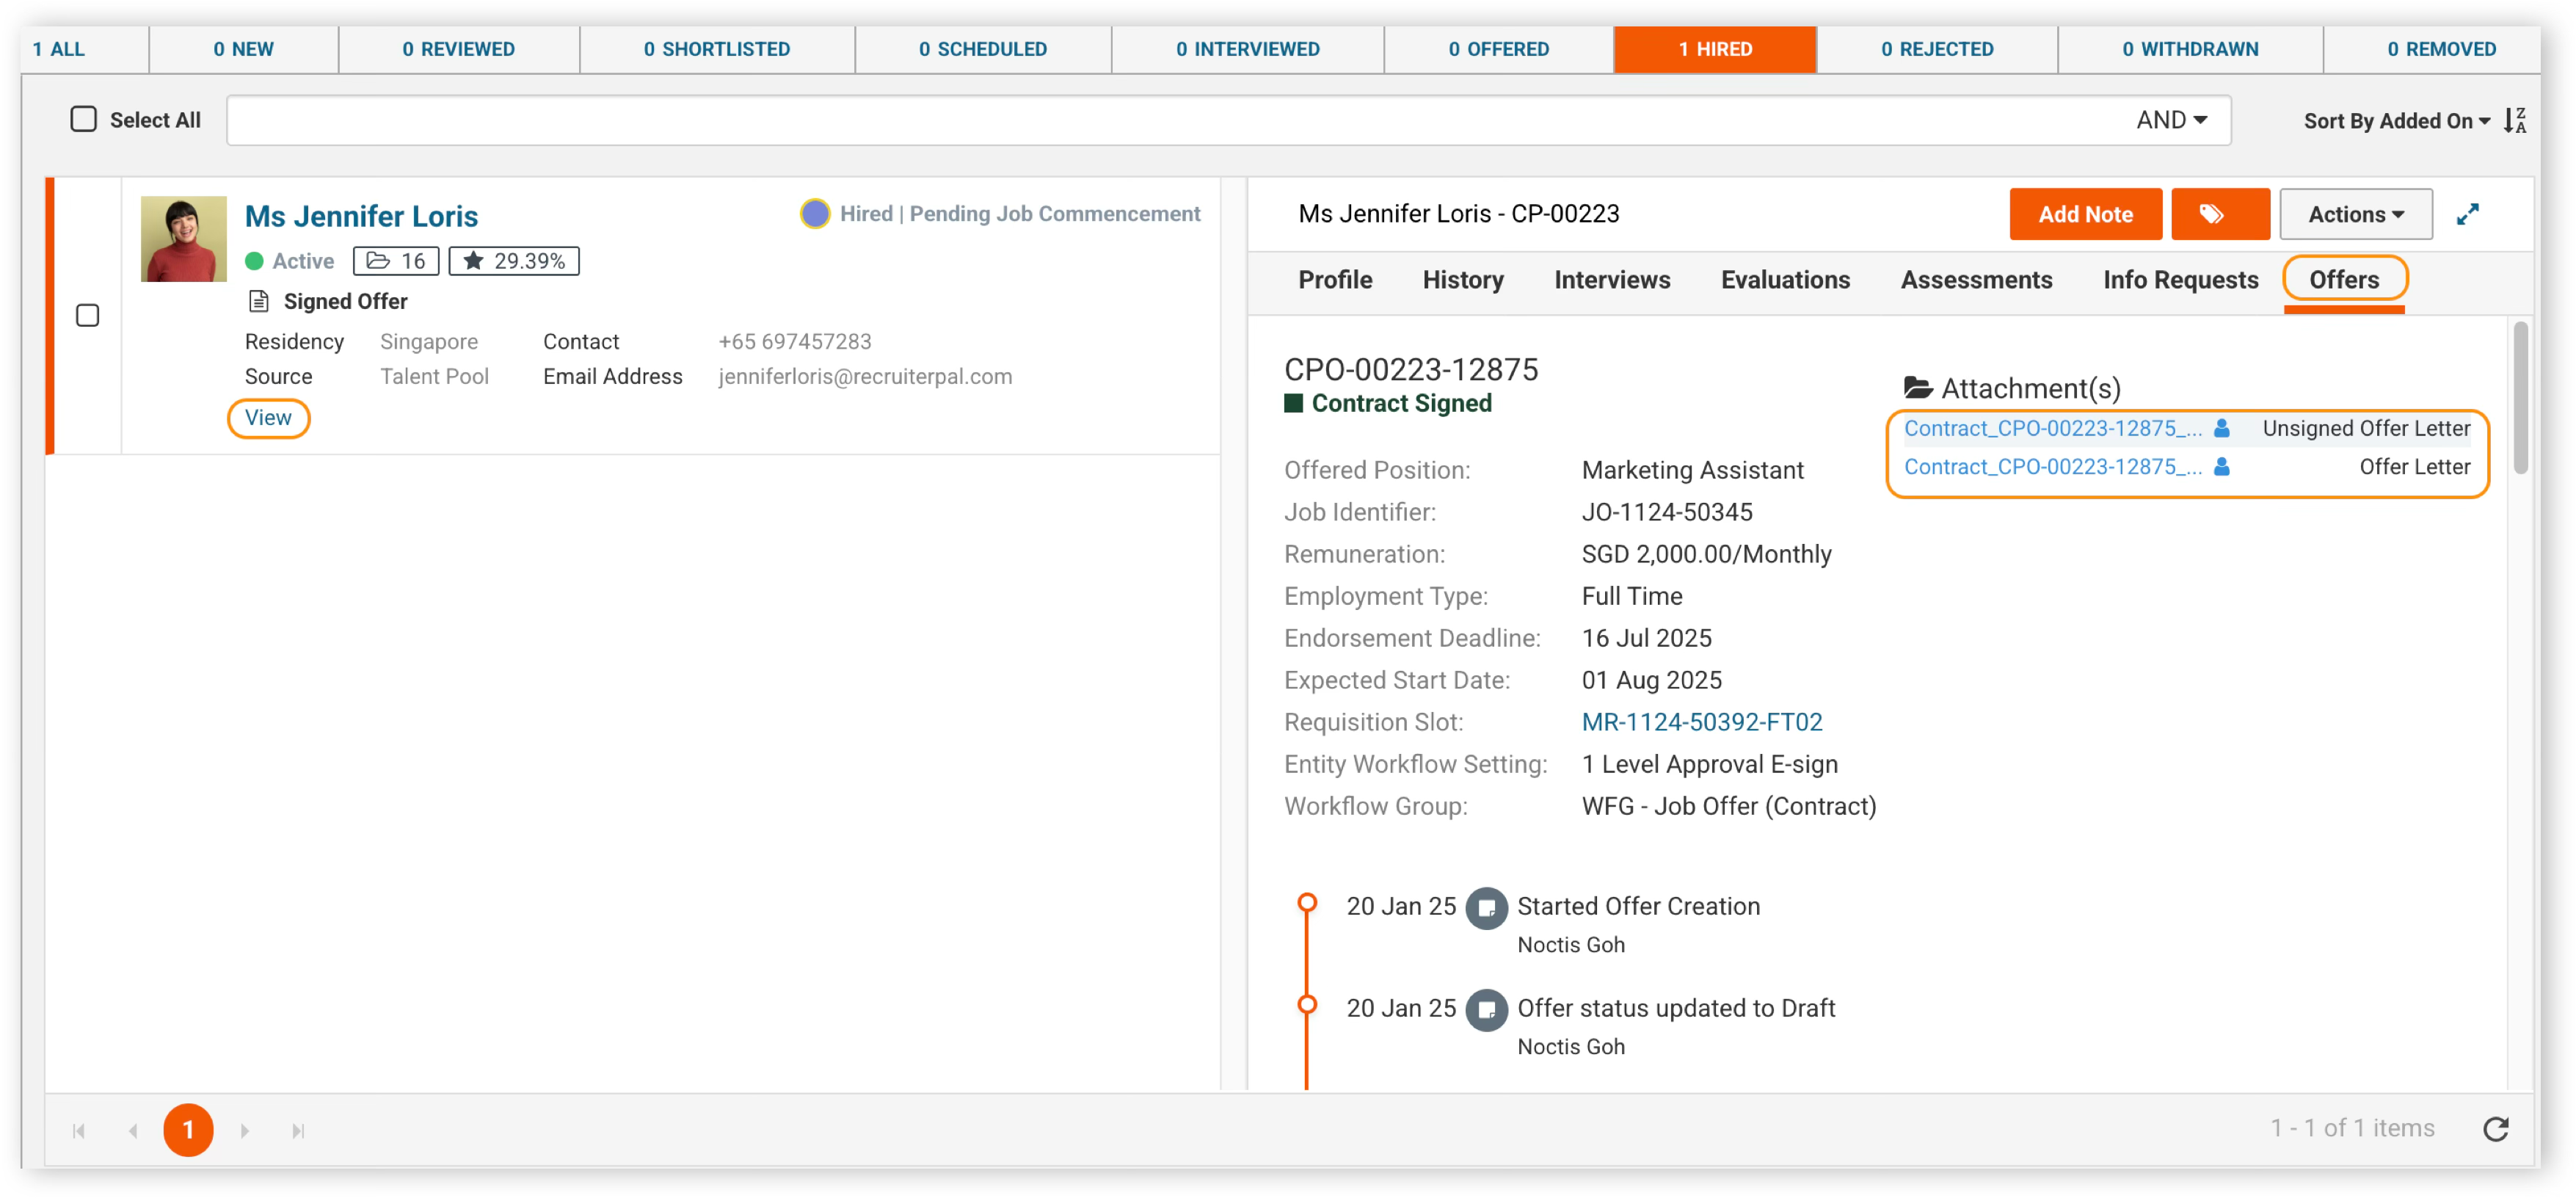
24. Upon completion of the e-signing process, the offer management workflow is considered completed
25. The user may refer to the offer tab for the candidate in the respective job opportunity to view the signed offer document
Was this helpful?